Showing posts with label Kid Directed. Show all posts

Sunday, April 27, 2014

Shaving Cream Painting

Shaving cream "paint" has been one of my standard sensory activities for the last five years. Probably the reason I love it so much is because it so inexpensive to make. Get the white foamy shaving cream (which also happens to be the cheapest-WIN). Then add food dye. In the past, we usually paint on cookie sheets although you could certainly do it in the bath tub if you wanted to. 


Then I saw the great idea from Happy Hooligans to use the paint outside on sliding glass windows. I love how you can use something a hundred times but someone will use it completely different and it brings a whole new dimension to it. 


The boys then decided that they should paint "B's" car. They have their own ideas on how the paint should be used. Which lead me to think of a car wash. Even though they were cleaning they were having a blast, a getting awesome sensory play in at the same time. 


Hey while they are cleaning out there why not clean the windows as well. They didn't even see it as a chore. Bonus for me!

Thursday, April 24, 2014

Freedom to Fly

So I hate to admit it but I have a little (or a lot depending on who you ask) problem of wanting to control things. I like predictability, routine, structure. Being a parent to two boys can make that a challenge, because boys are anything but predictable! I hate to say that often I get in their way of being kids. Take for example the other day as we sat to eat dinner the boys noticed a blue jay out our dining room window. 
We don't see a ton of blue jays in Anchorage. It was a wonderful reminder that spring was surely here. Spring:-what Alaskans long for as we wait for the last bit of seven months of snow to give us a brief reprieve. Well eating dinner was no longer a priorit, there was a bird to play with! "B" was especially adamant that he needed to go get that bird. Mind you he had not eaten anything and was half naked, but this was a matter of emergency. "A" was also brimming with excitement but was stifling it so he could appear to be the older, more mature child. The whole time I of course am being sensible, smart, structured....CONTROLLING. 

"You need to eat your dinner."- "You don't have clothes on."- "You will get cold."- "It is dirty."- "It is too late to go out and play."-"Leave the bird alone."- "It's not like you are going to catch it." blah blah blah...
Luckily, this is ONE time as a mom where I caught myself. I reflected on how it felt to chase birds when I was a child. I remember the joy and exhilaration knowing I couldn't catch them, but trying none-the-less. I wanted to fly just like them. As a child I certainly had the energy and audacity to fly, if God had just given me wings. Why was I stifling that experience for my boys? I realize how much I was clipping their wings as I held them back from these moments of wonder and exploration. Would the 5 minutes away from dinner running around in the cold yard do any damage in the long run? No, but not allowing them the "freedom to fly"  definitely would.
Spring is a time of renewal and rejuvenation. Just what we as a family need from time-to-time.
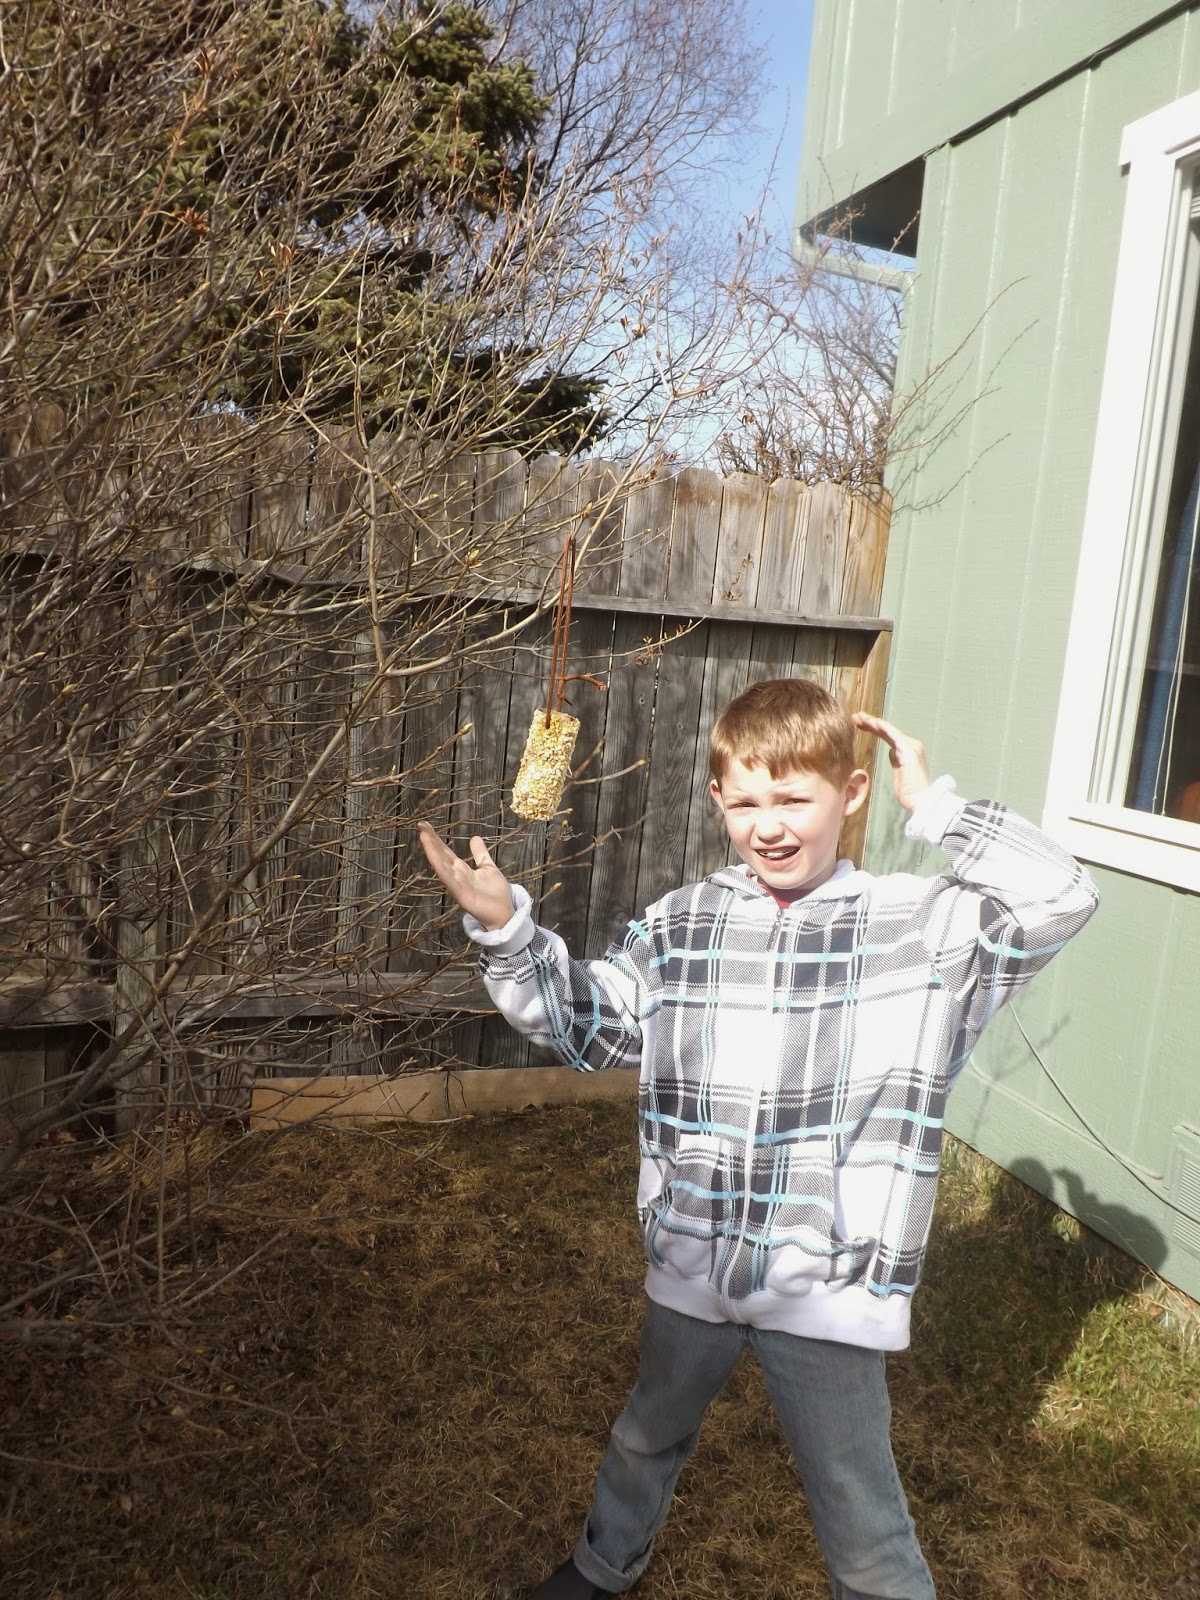
To remind myself of this moment and to try to be more conscious of letting my boys be kids I had them make some bird treats. Invite  the birds to come and next time my kids will be ready to play with them.
Perfect activity as we celebrate Earth Day. 
Take toilet paper tubes and spread with peanut butter. Make sure to punch holes first!
Roll in bird seed or cracked corn. I found a small bag for about $2.50 at Fred Meyers in the pet area.
We also found old bird houses we had painted about a year ago and hung those as well. They were found at Michaels in the $1 bin. I didn't treat it for the weather, which in hindsight I probably should have. 
So we are ready for the birds and I have  reminder out my dining room window that I want children that desire to fly, not be tethered down by the trappings of this life. 

Friday, May 11, 2012

Exploring Color

"A" has been asking me for months what different colors mixed together make. Which is funny because we have worked on primary colors in the past, but its good to relearn things to help aid recall and build schema. This week I drew some circles on a piece of paper and wrote the names of some colors under them. Then "A" would paint the two colors and then after mixing the two tell me what the new color they made was. I got the idea for this from kirarts blog. Here is "A" working on it:
I wanted to include more than the first three traditional color mixes.
If your child likes computer games there is a Curious George game that is great for color mixing and exploring color. There are only four colors to choose from and you have to pick when colors and the amount. George mixes it up and you can paint a coloring sheet. It took me some time to figure out how to make the color for Curious George himself but I did it. To play Mix and Paint go to PBSkids.org.

"A's" finished picture (all painted using only white, blue, red, and yellow)

Then because "A" loves water play so much I broke down and let him play with water glasses & food dye. I totally let it be kid-directed and let him have at it. This is so hard for me to do (especially because he used almost ALL of the dye). When he was done with the mixology I gave him some syringes so he could work on filling them with liquid and then squirting tit into one of our silicone ice trays. This was great fine-motor skill work for him and encouraged him to remain focused.

We got the tray from Ikea for about $2.50
After the ice cubes were made we did a little ice painting. The "paint" is very subdued and similar to watercolors. Since this was such a sensory activity I could have "B" participate. He wasn't in a mood so he only played with the ice a short while, but I popped them back in the freezer for another day. I am looking forward to more "messy play" with "B" as I learn more about his diagnosis of Sensory Processing Disorder. I was happy it was an activity that the whole family could participate, instead of leaving poor "B' out to watch big brother.
Aren't they pretty!
One of the ice painting masterpieces

Lastly, I wanted to show you a cute book we found by Melani Watt (one of our most favorite children's writers) called Leon the Chameleon. It has a great color theme-along with other important themes like feelings and friendship. This book in particular encourages critical thinking. Why would a chameleon be afraid if they turned into the opposite color of what they were standing on? To hear my 5 year-old read the first few pages watch the video. So proud of my reader!!!!

Thursday, September 29, 2011

Tea Party for Boys

The other day "A" surprised me with his own version of a tea party. There was no china or fancy tablecloths. fact there wasn't even tea, but juice boxes instead. What I also found was my ceramic ramekin filled with dog food for his stuffed animal and board games propping the toys up to eat.

Wednesday, September 28, 2011

Cookie Cutter Painting

The newest quest for kid-directed art I decided to lay out bowls of paint and a box of cookie cutters. Then just let them have at it!

Monday, September 19, 2011

Splotch

My son and I recently got the Roly-Poly Egg by Kali Stileman. I wasn't sure "A" would like it from the cover but we opened it up and fell in love with the main character-Splotch!
Splotch is a sweet bird who is made up literally of a splotch of paint. One day she laid a small, spotty, and perfect egg. As the egg goes on a rolling adventure among african wildlife Splotchy desperately tries to catch up. There is a fun dotted line on each page to track the path of the egg. When the egg hatches we meet Baby Splotch.
After reading the book we couldn't resist make Splotches of our very own! Using Splotches of paint (which are basically mistakes) was a true test of my patience with kid-directed art. I got to say I didn't have my best Mommy moments after paint ended up on the library book, floor, and dining room chair. The fact that I lost six hours of school work today didn't help my mood. That being said as always the finished product is always worth the trouble.
My Splotch and Baby Splotch with the hatched egg.
"A's" lift the flap egg.
"A's" Splotch and Baby Splotch.
Speaking of the Splotch character if you are into art at all pick up the book Beautiful Oops by Barney Saltzberg immediately! Most libraries carry it. It is pages of mistakes (torn paper, ink spots, holes, etc) turned into something new. In fact: check out the motto for the book:
So have fun making mistakes and turning them into beautiful pieces of art or perfectly wonderful characters.

Monday, August 22, 2011

Ready For Takeoff

We have boxes strewn across our house as my hubby gets ready to move to Alaska for work. It will be a long 7 months without Daddy around and can't wait until April when we will be joining him for the new chapter in our lives. "A" was desperate to build an airplane out of one of the boxes with Daddy. Airplanes are very important in our household because my hubby is a flight instructor. "A" has been around airports and small engine planes since he was born.

Finished Product
The airplane was completely my five year old's creation. Well, he had all the ideas and directed Daddy to do exactly as he said. Supplies were two boxes, duct tape ("A" saw it lying around and his creative juices started flowing), clear Saran wrap, glue stick, foam brushes, and tempura paint. It turned out amazing. My husband has told me about 50 times how the window with Saran wrap was all "A". The little man just keeps saying "He can't believe he made something so cool-he can't even believe it!

Work in Progress
Adding his joystick
Painting the "knobs"-see the windows with Saran wrap
Ready For Takeoff

Friday, August 5, 2011

Little Star-How I wonder...

One of our last projects for looking at space was to talk about stars and constellations. I had wanted to make with "A" a large star that some of my friends had their 3rd grade classroom do around Christmas. I got out my origami paper (you could use any paper-even wrapping paper) as long as it is square. Fold into a triangle and then once more. Then make two cuts on the fold line leaving about an inch at the edge. Open the paper up and tape the edges of the cuts together. Fold one together and then flip it over and fold it again. You will have three folds for each square. Then make a chain of 8 squares and then circle it around to make a star.When making the chain and circle I would use staples rather than glue or tape. Then you can hole punch one point and hang to enjoy.


"A" had to make a star from his own design using my origami  paper. I am trying to ease up and allow him to do more kid-directed art, rather than projects that I have a finished product in mind. This is a constant struggle with me that you can read in a previous blog.


After reading some books about constellations I found some constellation cards and had "A" punch holes where the stars are. We then put a flashlight behind the cards and made night sky on our bedroom wall. I got the idea for this from Counting Coconut's solar system mini-unit. Her mini-units are awesome and I recommend you check them out.


I couldn't finish the constellation unit with out trying out the most amazingly, cute idea that Relentlessly Fun, Deceptively Educational blogged about. You take a picture of your child laying on the floor in a strewn out position. Print out the picture on a full 8x10 page. Put a new piece of printer paper over the photo page and then have your child mark where stars would be if they were a constellation. Then draw straight lines linking the stars. We then glued stars from our confetti bag to make it a little more festive. "A" was really excited and proud to see the final constellation of himself!
Some Books We Read:
What kiddo doesn't like glow-in-the-dark books
Both of these book are by Jacqueline Mitton and are very beautiful. Great inspiration for your personal constellation.